
Installing A Cync Wire-Free Keypad Dimmer
Location + Mounting Type
Decide where you want to mount your Cync Wire-Free Keypad Dimmer Smart Switch / Remote. The Wire-Free keypad dimmer can be mounted as follows:
- Keypad Dimmer to Junction Box - mounted inside a 1 gang empty electrical box.
- Keypad Dimmer to Wall (Permanent) - affixed to the wall with screws.
- Keypad Dimmer to Wall (Removable Adhesive) - affixed to the wall by adhesive tape, removable later.
- Remote to Magnetic Surface - remote attached to any magnetic metal surface.
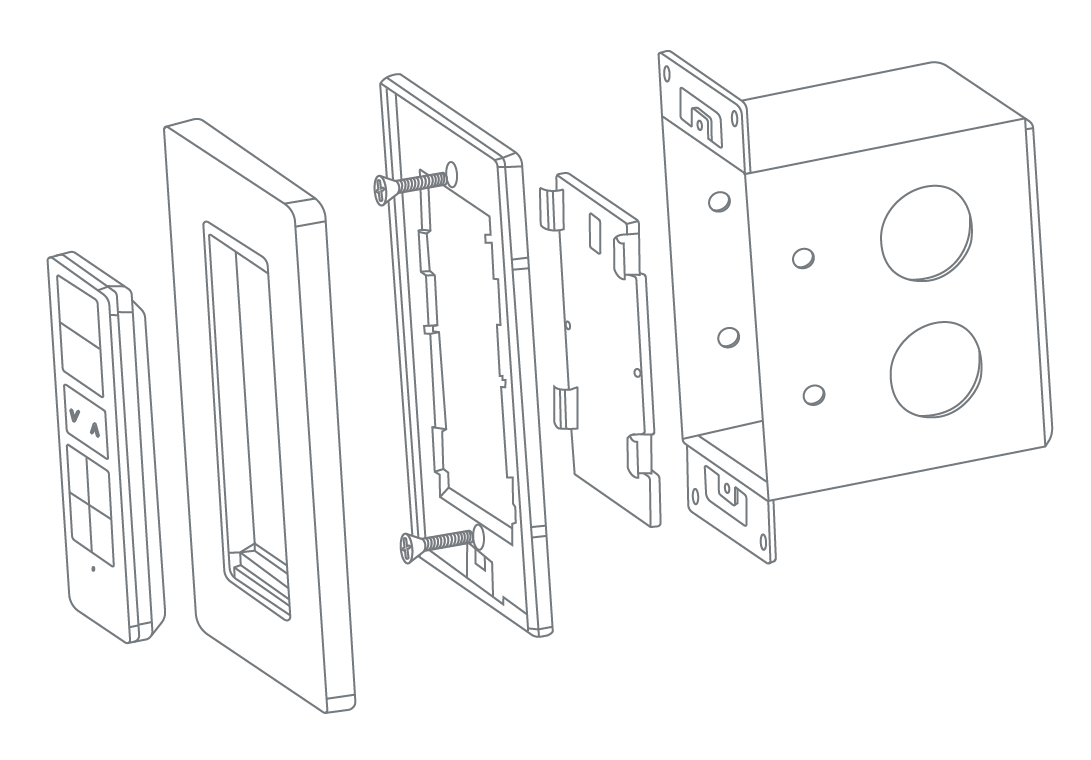
What's Included
- Keypad Remote (1)
- Faceplate + Bracket (1)
- Phillips Mounting Screws (4)
- Drywall Anchors (2)
- Double-Sided Adhesive Strips (2)
- Reset Pin (1)
Keypad Dimmer Details
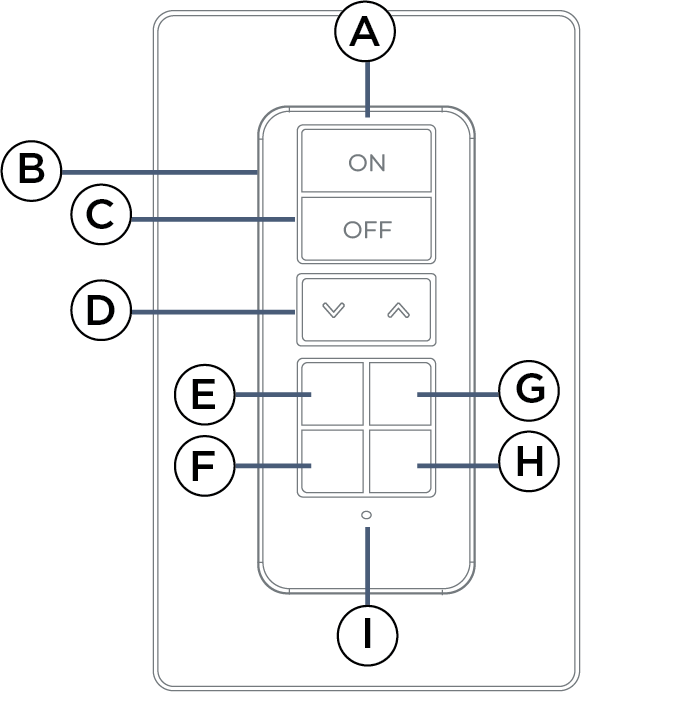
| A | Remote | Detachable Remote. |
| B | Face Plate | Affixed Face Plate. |
| C | Reset Hole | Press and hold for ten seconds to reset the remote. |
| D | On / Off Button | Toggle lights ON or OFF |
| E | Dimmer / Brightness Adjustment | Adjust dimming/brightness percentage |
| F | Every Day Scene | By default, button that activates the Every Day Scene. |
| G | Social Scene | By default, button that activates the Social Scene. |
| H | Entertaiment Scene | By default, button that activates the Entertainment Scene. |
| I | Night Light Scene | By default, button that activates the Night Light Scene. |
| J | Remote Status Indicator Light |
|
Installation Methods
Keypad Dimmer to Junction Box
Required Tools
- Phillips Head Screwdriver
- Flat Head Screwdriver
- Drill with 7/32" bit
Installation
- Install your 1 gang electrical box.
- Ensure the wire plate cover is attached to the bracket, then align the bracket with the junction box screw holes.
- Use the provided long screws to mount the bracket to the box.
- Snap the face plate onto the bracket.
- Remove the protective film and place the keypad dimmer into the face plate.
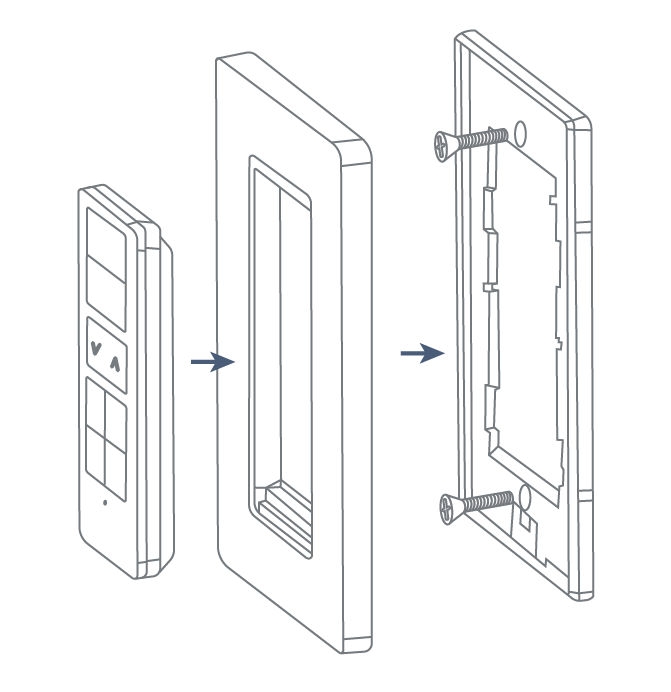
Keypad Dimmer to Wall (Permanent)
Required Tools
- Phillips Head Screwdriver
- Flat Head Screwdriver
- Drill with 7/32" bit
- Level
- Measuring Tape
Installation Steps
- Remove the clear plastic tab from the back of the keypad dimmer.
- Identify where you want to mount your wire-free keypad dimmer (Keypad Dimmers are typically located 48-52” from the floor to the top of the Keypad Dimmer.)
- Mark the location for holes to be drilled.
- Use the mounting holes on the keypad dimmer housing as a guide.
- (Optional) - Use a level to ensure the keypad dimmer is level before drilling holes.
- Using 7/32” bit, drill holes in the wall for mounting screws. Insert drywall anchors.
- Secure the keypad dimmer to the wall until level and flush.
- Screw on the face plate bracket, then snap the face plate cover into the bracket.
- Place keypad dimmer onto the faceplate cover.
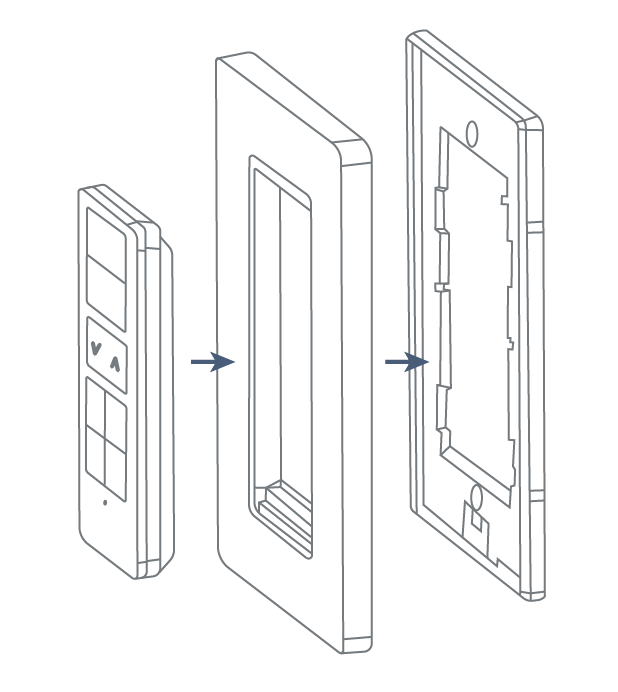
Keypad Dimmer to Wall (Removable Adhesive)
- Remove the clear plastic tab from the back of the keypad dimmer.
- Identify where you want to mount your wire-free keypad dimmer (keypad dimmeres are typically located 48-52” from the floor to the top of the keypad dimmer).
- Prior to installation, be sure that the surface is smooth and degreased.
- Apply adhesive tape to the middle back of the keypad dimmer. Adhesive tab should stick out from the side of the keypad dimmer. This will be covered by the wall plate and allows removal if needed in the future.
- Mount keypad dimmer to the wall.
- Screw on the face plate bracket, then snap the face plate cover onto the bracket.
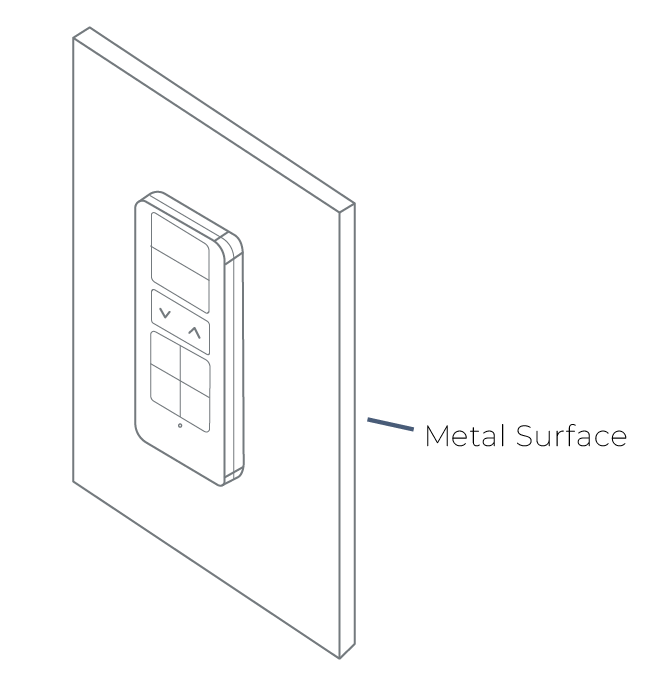
Remote to Magnetic Surface
The Keypad Dimmer Remote itself is magnetic and will attach to metal surfaces. Remove the clear plastic tab from the Keypad Dimmer to begin using.
Continue to Setup
Once installation is complete, the Keypad Dimmer must be configured within the Wire-Free Devices section of the Cync app. For more information, see Setting Up a Cync Wire-Free Keypad Dimmer.