
Mounting Neon Light Strips
Instructions on mounting and installing Cync Neon Light Strips
Quickly navigate to the section you need by following one of the links below.
Before You Begin
Installing Neon Light Strips
Trimming Light Strip and Mounting Control Box
Before You Begin
BEFORE ATTEMPTING THE INSTALLATION PROCESS, BE SURE TO READ ALL INSTRUCTIONS THOROUGHLY.
Materials
Materials you will need for installation:
- Screwdriver or hammer (depending on your installation method)
- Masking tape
- Sharp pencil, pin, small nail, or other sharp instrument
- Scissors (if applicable)
Best Practices
Cync Neon Light Strips are suitable for installation on drywall, plaster, concrete and masonry, wood, glass, and a variety of other surfaces using one or more of the included hardware options. See below for best practices with these surfaces. Read all instructions before attempting installation of your Neon Light Strip(s).
- Concrete, masonry, stucco, and cement fiber board: it is recommended to use the included 1-inch #4 screws with appropriate wall anchors (not included).
- Drywall and plaster: Use traceless nails. It is highly recommended to use the included 3M adhesive is used in addition to the traceless nails.
- Drywall and plaster (alternative method): use the included 1-inch #4 screws with appropriate wall anchors (not included).
- Glass, steel, or other surfaces: Where using nails and screws are impractical or impossible ONLY use the 3M adhesive.
- In all scenarios, it is recommended to use more than one method of mounting your Neon Light Strip when possible.
Installing Neon Light Strips
Prep the Surface
- Make sure the surface you are installing your Neon Light Strip(s) to is clean, dry, and free of oil contamination. For best results, install the strip in temperatures above 50°F (10°C).
Layout Your Design
- With the Cync Neon Light Strips, you can create your own design or use a pre-made design available for download on our Neon Design Guide page. Determine which method you are using to install your Neon Light Strip and continue with the appropriate steps below.
- Layout with a Pre-made Design
- Choose and download a design from the Neon Design Guide. Determine the location to install your Neon Light Strip and that there is enough room for the design chosen.
- Unfold the Layout Grid included in the box of your Neon Light Strip and place on a flat surface.
- Refer to the design template downloaded in Step 1 and mark all clip locations and orientation onto the Layout Grid.
- Tape the Layout Grid to the wall surface with masking tape. This is what you will use to shape your Neon Light Strip.
- Gently poke through the Layout Grid with a sharp instrument to mark the clip placements on the wall.
TIP: In order to save your Layout Grid for future use, poke holes through the Layout Grid onto the wall to mark clip placements. Before installing the clips, remove the Layout Grid from the wall.
- Remove the Layout Template from the wall surface.
- Proceed to Install Your Neon Light Strip.
- Choose and download a design from the Neon Design Guide. Determine the location to install your Neon Light Strip and that there is enough room for the design chosen.
- Layout With Your Own Design
- Determine the location to install your Neon Light Strip.
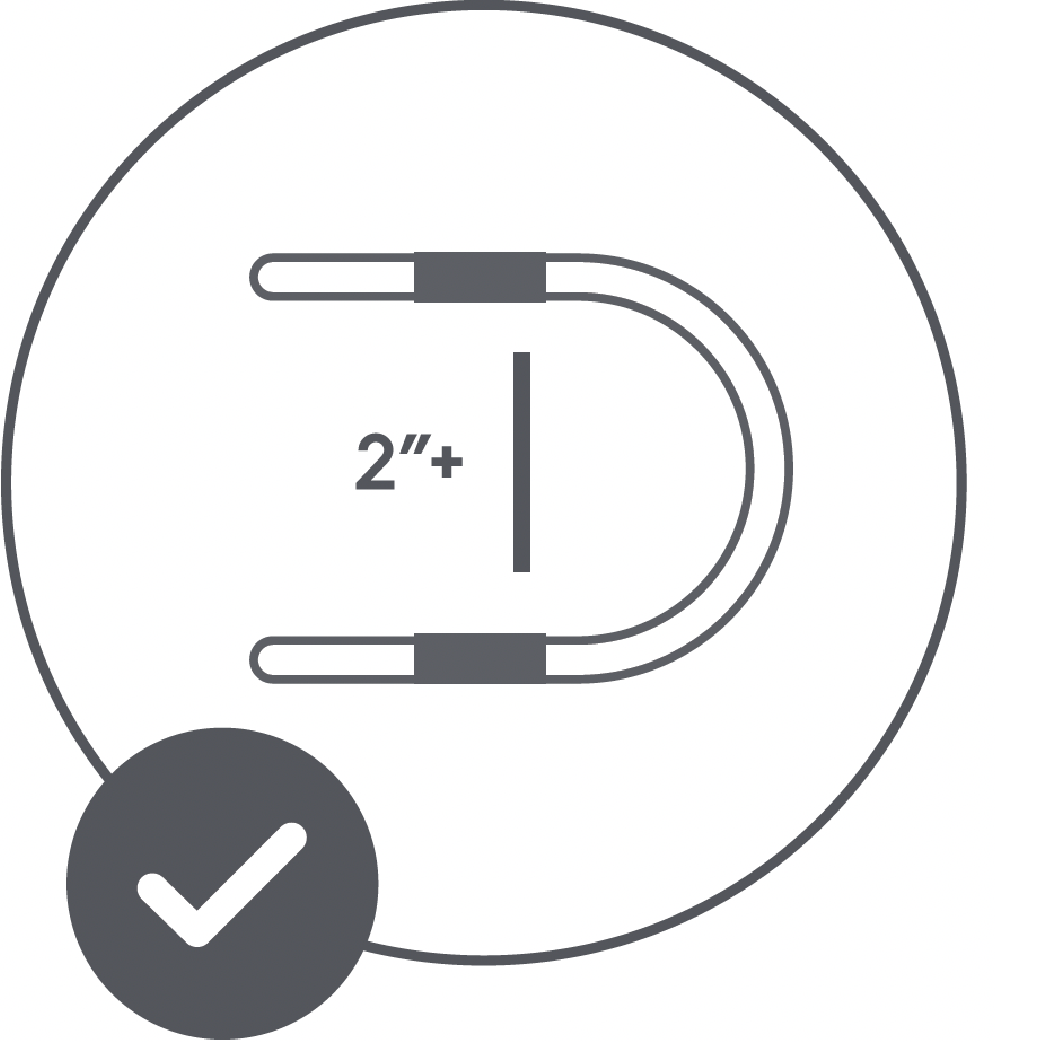
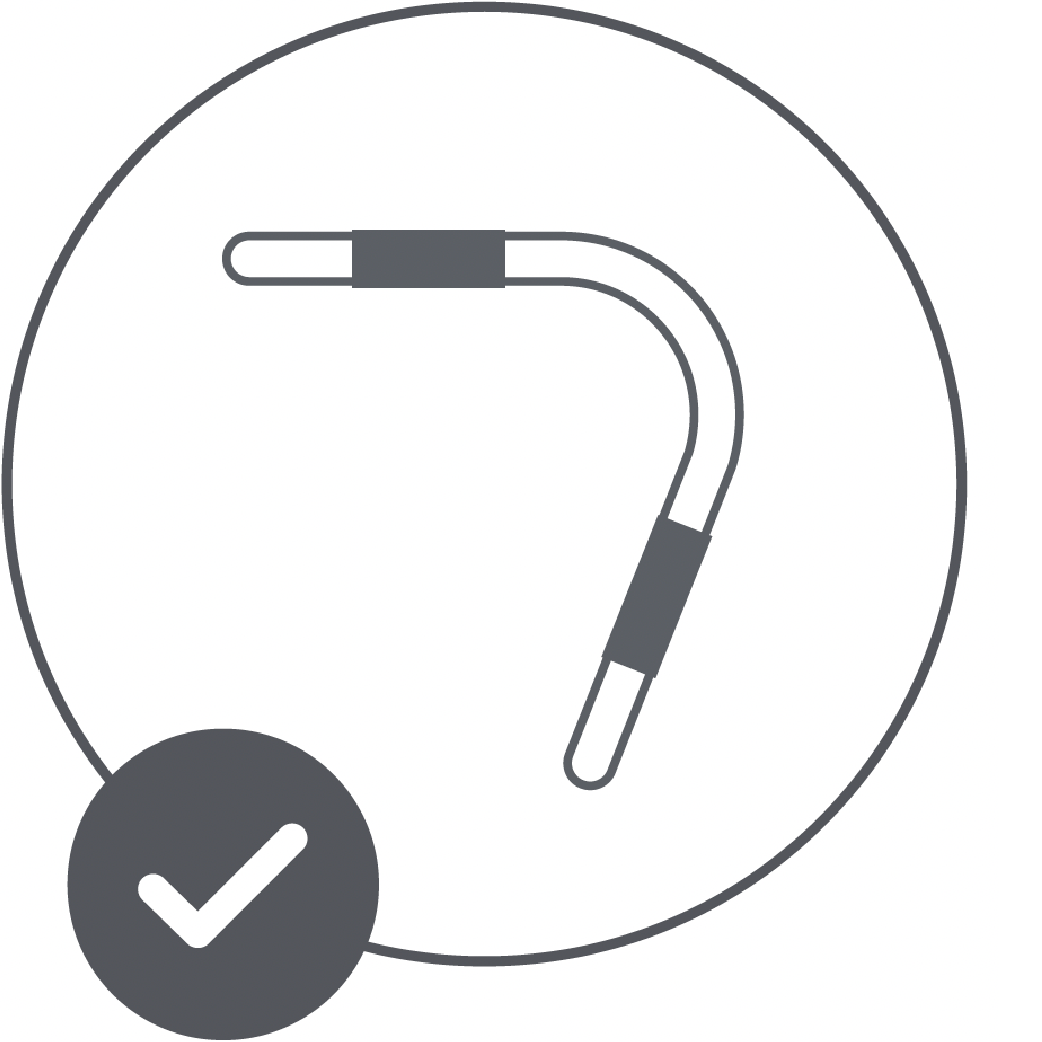
- Create your design using the Bending and Clip Placement Guidelines below:
- Proceed to Install Your Neon Light Strip.
- Determine the location to install your Neon Light Strip.
- Layout with a Pre-made Design
Install Your Neon Light Strip
- Install the clips for your Neon Light Strip with one of the two recommended installation procedures; mounting clips with screws and mounting clips with nails. Determine which method is right for you and follow the method steps below:
- Mounting Clips with Screws: Confirm clip location and orientation. If using the removable tape on your Neon Light Strip, remove the tape backing and adhere the strip to the wall. Insert a screw into clip and screw into the wall. (If pre-drilling is required, use a 1/16in drill bit). Repeat this step for each clip.

- Mounting Clips with Screws and Wall Anchors: Purchase wall anchors (sold separately) for the included 1-inch #4 screws. Confirm clip location and orientation and mark the screw location. Drill a hole for the wall anchor following the wall anchor manufacturer’s drill size guide. Install the wall anchor in the wall. If using the removable tape on your Neon Light Strip, remove the tape backing and adhere the strip to the wall. Insert a screw into clip and screw into the wall anchor. Repeat this step for each clip.
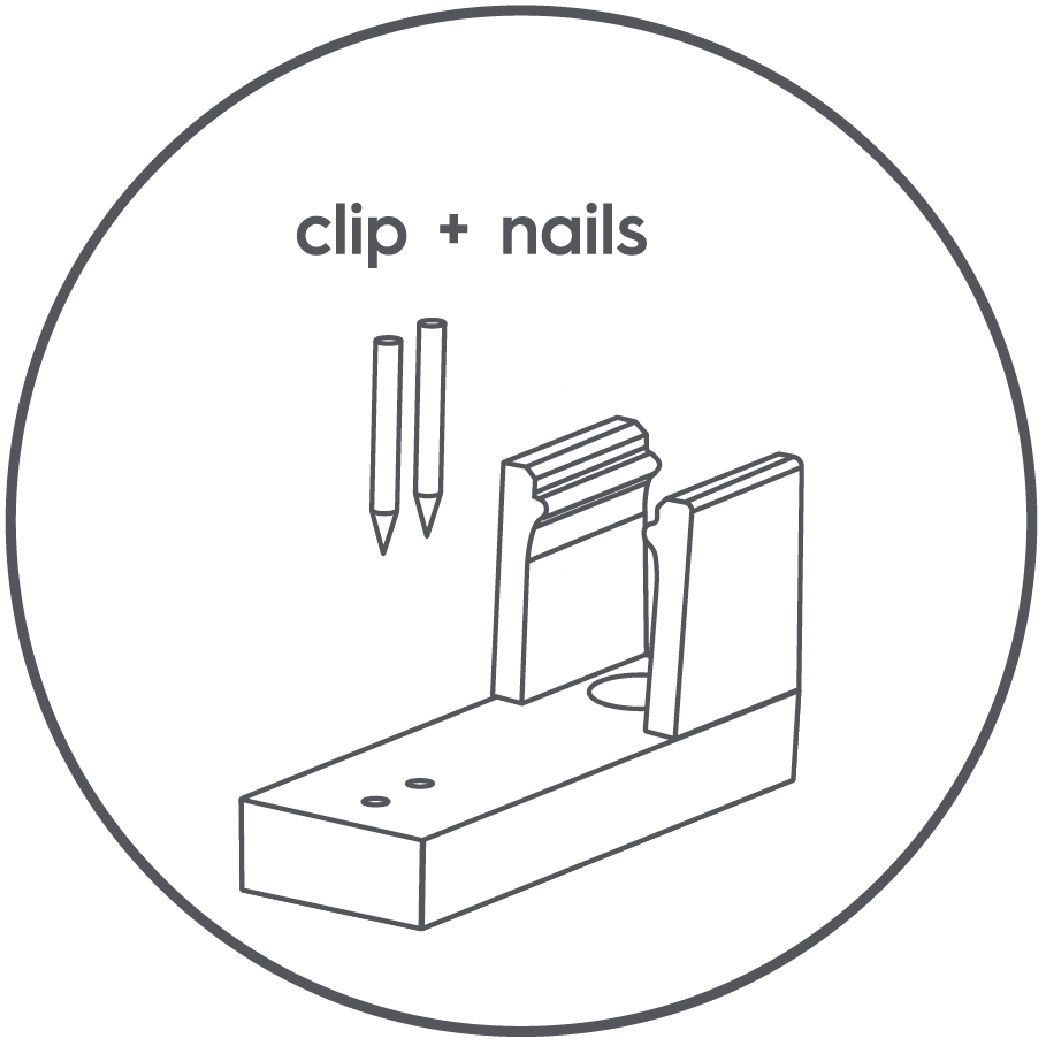
- Mounting Clips with Nails: Confirm clip location and orientation. If using the removable tape on your Neon Light Strip, remove the tape backing and adhere the strip to the wall. Insert nail into the small clip hole and use a hammer to gently tap the nail into the wall. Repeat this step for each clip.
TIP: Use a pair of pliers or other metal tool placed on the head of the nail to provide a larger surface to strike with the hammer.
- Mounting Clips with Adhesive Only: While it is not recommended to use only the adhesive on the clips, here are some tips for success should you choose to try this method.
- Ensure the surface is clean and dry. Even if the surface looks clean, use the included cleaning wipe or rubbing alcohol on a lint-free cloth to clean the surface and ensure it is dust and oil free.
- Firmly press the clip with adhesive in place for 15-20 seconds.
- Reduce strain on the clips by limiting sharp bends and direction changes.
- Ensure the surface is clean and dry. Even if the surface looks clean, use the included cleaning wipe or rubbing alcohol on a lint-free cloth to clean the surface and ensure it is dust and oil free.
- Mounting Clips with Screws: Confirm clip location and orientation. If using the removable tape on your Neon Light Strip, remove the tape backing and adhere the strip to the wall. Insert a screw into clip and screw into the wall. (If pre-drilling is required, use a 1/16in drill bit). Repeat this step for each clip.
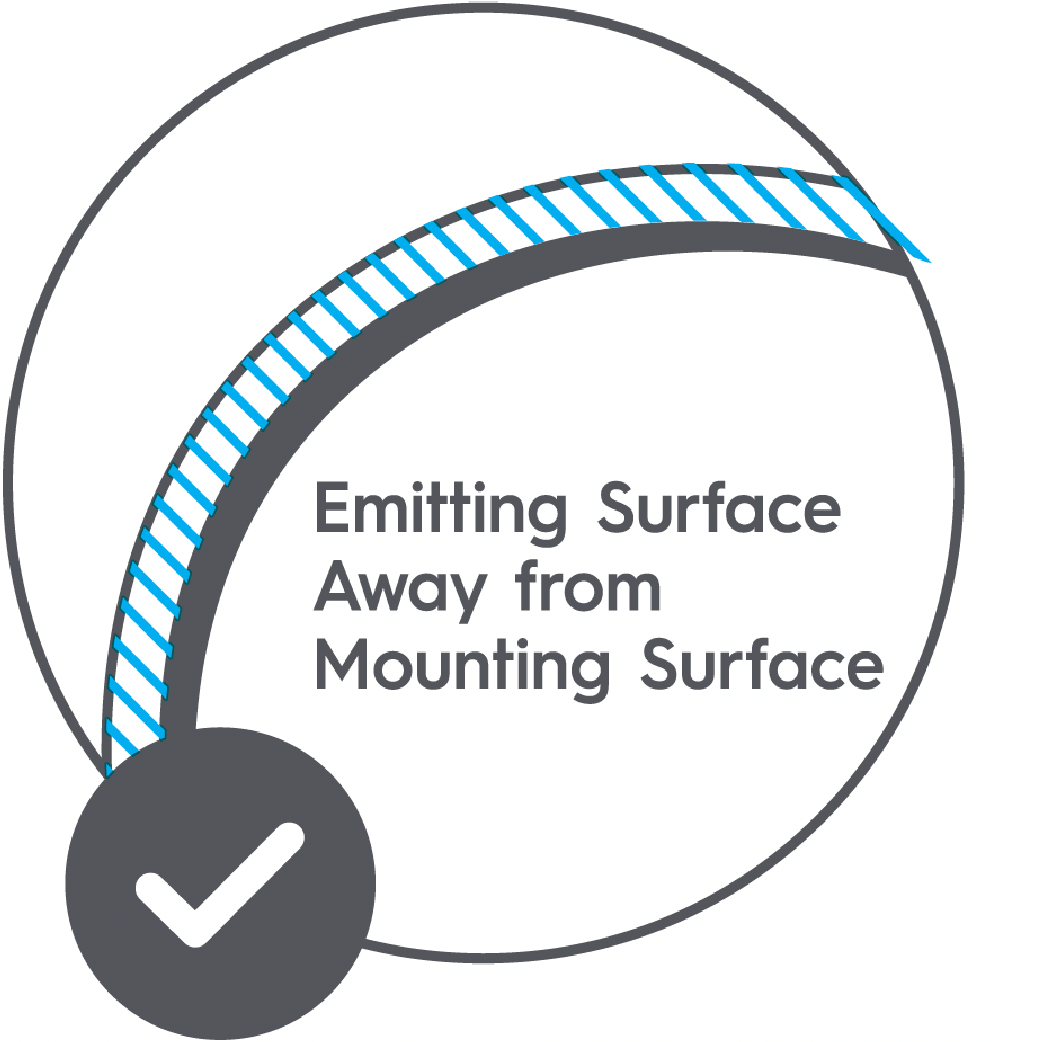
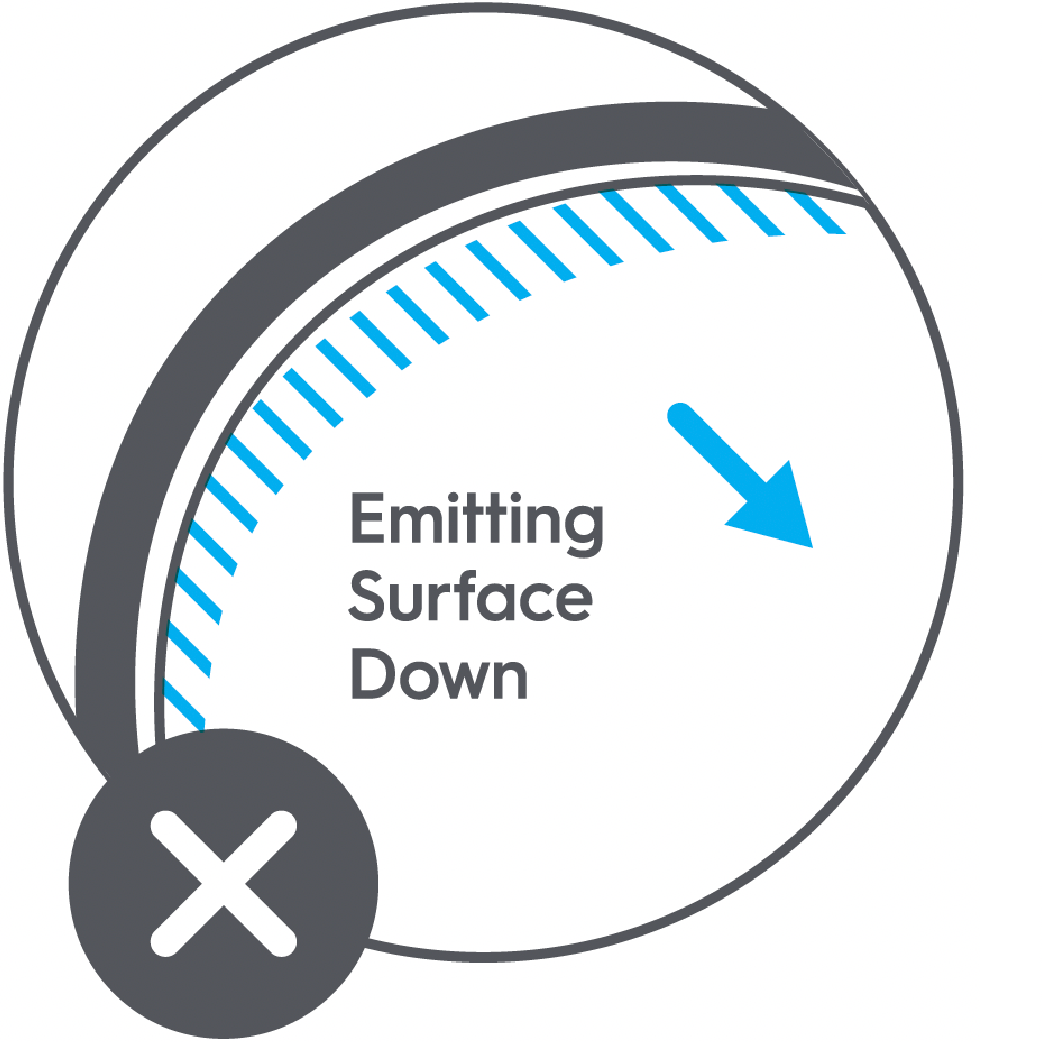
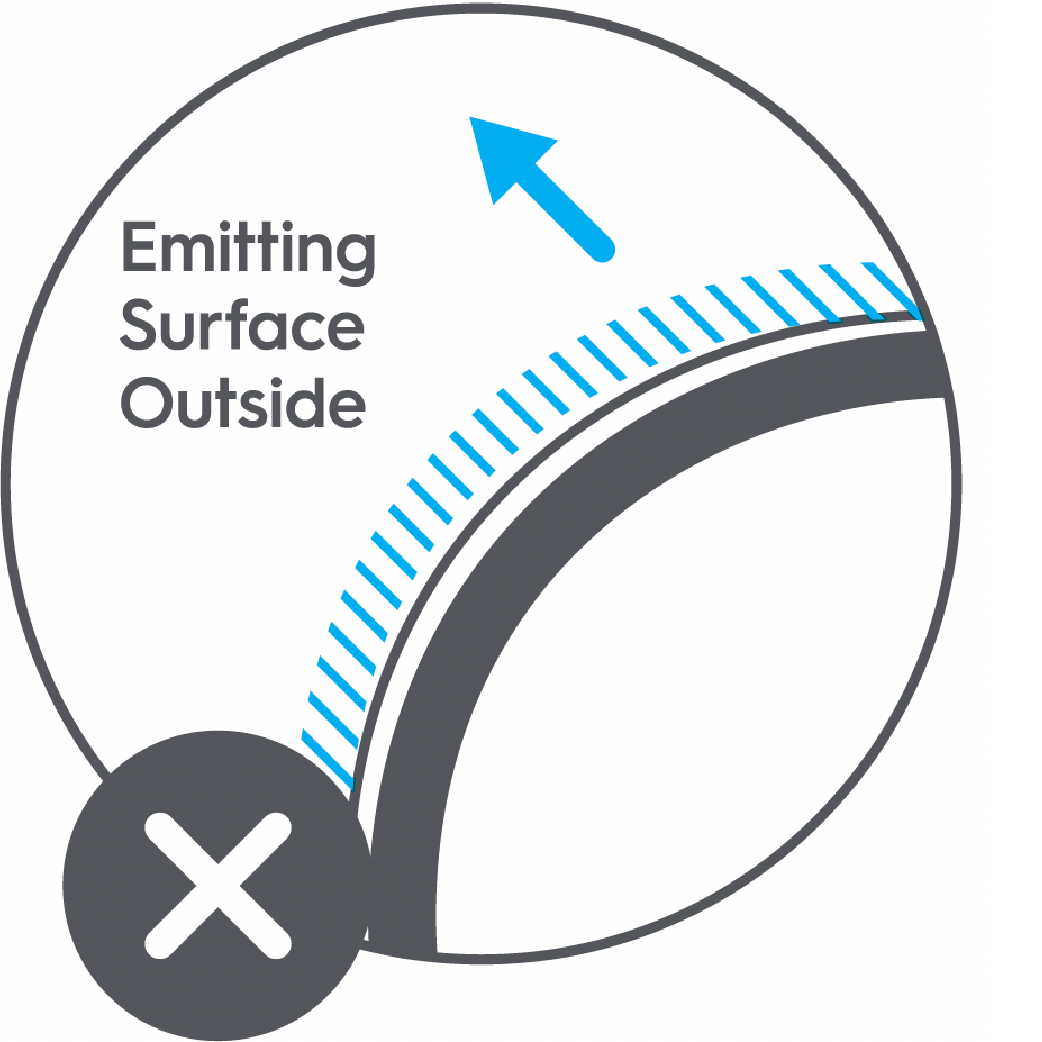
- Position the Neon Light Strip with the light emitting surface away from the mounting surface. Mount the light strip by inserting the strip into each clip and gently pressing to snap it into place.
- You may adjust the design by sliding the strip in the clips to desired position.
Trimming and Mounting Control Box (Optional Steps)
Trimming the Neon Light Strip and Mounting the Control Box
After your Neon Light Strip is installed, there may be excess length that needs to be trimmed. Determine if you need to trim your light strip and follow the steps below.
- Unplug the Neon Light Strip. Do not trim if the light strip is plugged into the wall.
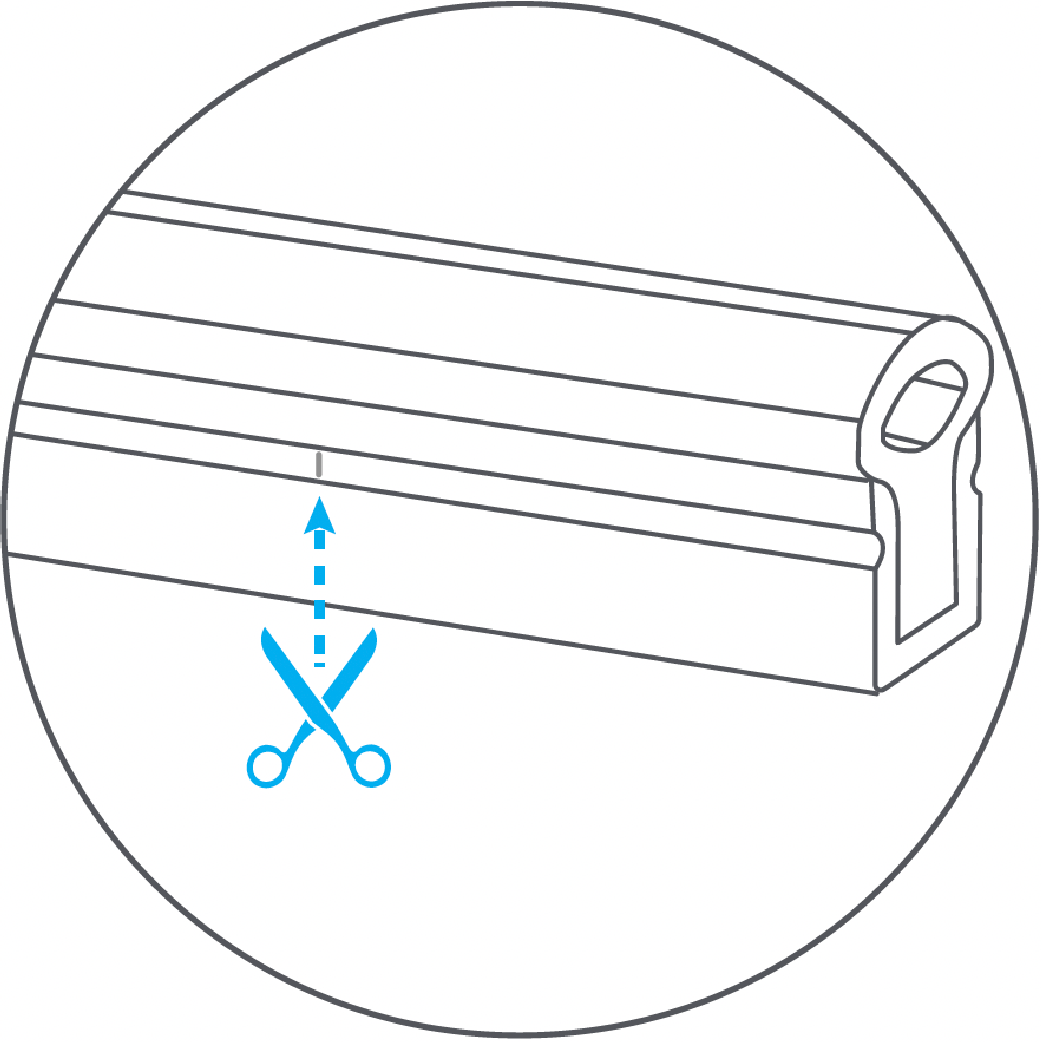
- Safely cut where the trim points are indicated in black. The light strip can be trimmed every 2.8in.
NOTE: Cutting anywhere else other than the trim points will permanently damage the Neon Light Strip.
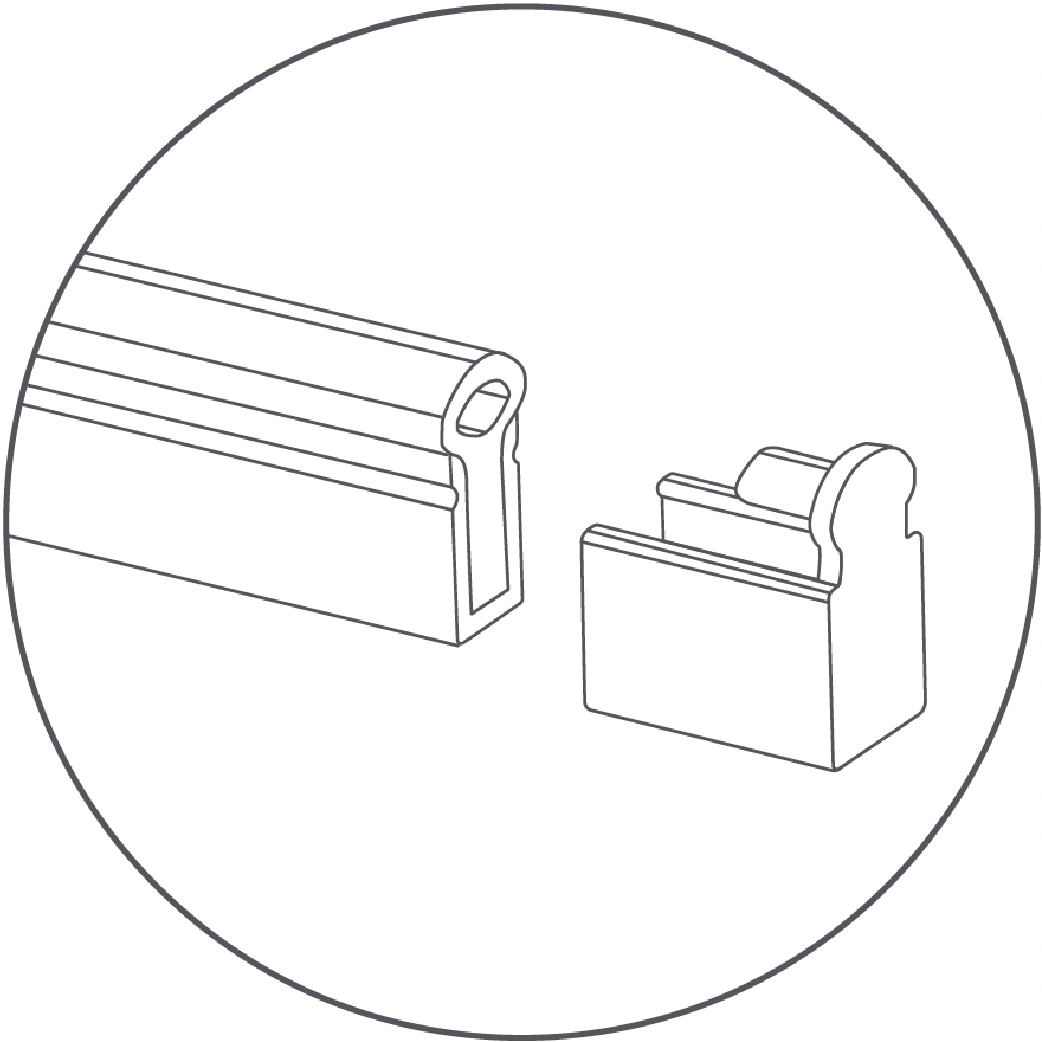
- Using the end cap included in the box with the Neon Light Strip, insert on to the end of the light strip where it was trimmed.
Mounting the Control Box
- Determine where the control box will be mounted.
- Insert the provided screws into the holes in the control box.
- Screw the control box into the wall.